Last week ended well. A remote user has been using a work app in an odd way and now she can finally use it 99% just like the users at our main site. Cool. Before, I had her connecting to our main site via Sonicwall Global VPN client, then using RDP to a virtual machine. No, it's not a horrible way to use the app, but it's not the best. Why did I have her setup this way? I'll explain.
Our application we use for HR, payroll, general ledger, project management, etc. runs from serer1. It's installed on that server. Our main site users have a mapped drive to server1 and a shortcut to the app on their desktops. They click on the shortcut, and since the app is web based, IE 8/9 pops up with the app graphic and a link for the database to connect to. Once the database link is clicked, the login window pops up for the user to put in her credentials then away she goes working. That's how the run process, well, runs. For the remote user, I had in mind the following: connect via vpn then use the app just like users at the main do. Well, my setup didn't go as planned. Earlier this year when I setup the remote user for app use, I ran the sonicwall vpn global client to connect to our main site. I mapped the drive to server1, placed the shortcut to the app on her desktop, clicked on it, ran the config, the IE app graphic window popped up, I clicked on the database link, but then nothing happened after that. Nothing. I clicked again and nothing. I at least expected an error message, but I wasn't given anything. The user was pressed for time. I asked her if I could investigate, that it could probably take a lot of time and she more or less said "no." I told her I could make a quick fix and she was fine with that. So, I setup the RDP method. She was fine with that and she had been fine with that for many months.
Last week she reminded me about it and wondered if I could eliminate the remote step. I told her it would probably take some time and she was fine with that. I setup a lab in my office, almost identical to her setup (the only difference was my connection was wireless). In my lab an error message displayed on the screen. I clicked on the database link, then BAM an error message popped up reporting an app crash. I flew to the event viewer and found an application crash reported. I then decided to compare and contrast my lab setup and our production setup. I found a difference (besides the vpn connection, :P): our production computers had .NET Framework 4 Extended and Client Profile whereas my lab computer only had .NET Framework 4 Client Profile. So, I installed .NET 4 Full on my lab computer and after that the app worked flawlessly.
I then called the remote user, setup a time, went out there installed .NET 4 full and then the app worked exactly as it should have worked. The user was ecstatic. I had never seen her so happy. She told me she didn't mind going through the RDP, but the text was small, the connection would timeout after inactivity; just those little things that don't ruin your work, but are just so annoying you can't work happily you know? Well, so far, so great for her current setup. All she has to do now is run the sonicwall global vpn client then she is able to work within the app.
Any suggestions for an alternate setup?
Monday, December 10, 2012
Wednesday, December 5, 2012
Can't Change Screen Resolution During Remote Session
Yesterday, I got a call from the power user telling me the client wasn't happy with the display size for her remote session, especially since she couldn't customize the screen resolution or display size (both are grayed out during a remote session). The remote user was trashing the vpn connection, our software, and everything else that wasn't related to the actual issue. The power user said he couldn't figure out why they couldn't change the display settings. He thought it may have been a privilege issue, but that's not the reason. From what I know, display settings cannot be changed during a remote session.
To fix the issue I went to our server, logged into the virtual machine the remote users logs into and changed the display size to 150%. She was happy, the power user was happy; it was good.
There might be a workaround, but I don't know of one. I'm not far from the physical server, so the best solution for me was to go to the server and change the display size for the vm, call the power user and ask him how the new size looked.
If you know of a solution for changing the display size of a pc during a remote session comment below.
Tuesday, December 4, 2012
Screen Resolution Problem and Enlarged Text
Interesting problem yesterday. I have clients who run surveillance camera software (CMS) on their computers. The software pulls the feed from their networked dvr system. The network has mixed client hardware, i.e., each client has different monitors and a different workstation (though I've almost got each client the same workstation now), so I installed the CMS software to match the client's screen resolution choice. After setup, there have been no problems with the CMS configuration for many months.
Yesterday, I received a call from one of the clients. He told me when he clicked on the CMS icon a window appeared with a message "screen resolution must be at least 1024 x 768." I asked him to please check his resolution, walked him through that process and, no surprise, found out his monitors (he has two) both have that resolution. I'm not far from the client so I just made the walk over to his office. I checked the resolution to just knock that off my troubleshooting list and I couldn't believe that CMS still wouldn't run. I was truly bamboozled. Windows screen resolution is 1024 x 768, but CMS wouldn't run because the resolution had to at least be 1024 x 768? Confusing. It was just confusing.
He has an nvidia video card with a control panel. So, I checked that just out of curiosity and obviously the resolution there matched Windows. I checked the Windows Update history. He said CMS worked just fine Friday. Their systems do windows updates over the weekend, so I thought maybe there had been a big update or something. The only update over the weekend was an update for Windows Defender. To my knowledge, that wouldn't have anything to do with my problem. After drumming my fingers for a little bit, I decided to reinstall the software sine it's a simple install. I reinstalled the software hoping that would fix the issue. It didn't. I truly didn't know what to do. Trying not to panic, I went through my history list with this system (these are very helpful) and found that when setting up the system I enlarged the display text to the maximum size, which is 150%. I checked the text size and it was still set to 150%. I turned it down to medium 125%, logged off then logged back in and clicked on CMS. The software ran. Again, bamboozled. Since I reinstalled CMS earlier, I had to configure the software with the dvr (less than 5 minutes) and it worked just fine. I asked the client if that display size was fine and he said it looked great (though back in the day of setting up this system he liked the max size...no comment). So, I left the display size alone at 125% with the screen resolution of 1024 x 768. Which the only difference is between then and now is the display size.
What happened? I don't know. Event viewer didn't tell me anything either. My client is happy, but I'm perplexed about CMS suddenly not recognizing that Windows did have the correct resolution for the software and that the software worked fine for many months with the 150% text display.
To any readers: thoughts?
Friday, November 30, 2012
Excellent Group Policy How-To
I've been testing Window Server 2012 via the "Early Experts" class, which is a very cool class, and experienced this very informative, super user-friendly TechNet how-to article on Group Policy. I'm not a GP guy. What I mean by that is that my job doesn't require a deep understanding of GP, only a foundational level understanding of GP, so I don't know the really cool things you can do with GP for your network(s). After going through this how-to for Server 2012 I now understand some deeper things about GP.
The how-to is for Server 2003, but it works for Server 2012 at least for the part we are at in Administering GP.
Check it out here.
I highly suggest going through, at your own pace, the Windows Server 2012 Early Experts challenge.
The how-to is for Server 2003, but it works for Server 2012 at least for the part we are at in Administering GP.
Check it out here.
I highly suggest going through, at your own pace, the Windows Server 2012 Early Experts challenge.
Monday, November 19, 2012
Slay the File Recovery Malware
I recently slayed the File Recovery malware on my brother's computer. I'll give you my routine that worked. If you have another one, please let me know in the comment box.
File Restore hides your start menu links and a bunch of other stuff to scare you that your computer is truly broken. We won't restore this stuff in the beginning of the routine though. I wanted to go ahead and tell you so you know why those links are gone in case you have to deal with this beast.
I disabled Microsoft Security Essentials real-time scanner in preparation for Combofix.
I then ran combofix. I ran combofix before Malwarebytes because I know this malware is really nasty and wanted to go in with the big guns first. Don't be scared to run comboxfix. Start the app file, proceed with defaults. It will go through around 50 scans (the speed of the scans depends on your computer's specs - I've seen it go fast, I've seen it take a while - 10 to 60 minutes) then, it will create a log report, then open the log report giving you details on what it did.
Rebooted into safe mode.
Ran Malwarebytes quick scan. It only detected some PUPs. I told Malwarebytes to delete them anyway because it was adware and I wanted to make the system squeaky clean.
Rebooted into normal mode.
Ran Windows Repair. This tool is amazing. File Restore can really mess with the default settings for Windows, thus making it look broken. Windows Repair fixes the stuff malware screws up like that. It's a very nice tool. It automatically reboots after the scan finishes. This scan can take a while too. Again, the speed of the scan depends on the specs of your computer.
Windows was fixed after this routine. I wasn't done yet though. I enabled the real-time scanner for Microsoft Security Essentials. I made sure the quick scan was on a daily schedule. It was. I also wanted to make sure this computer was safe not just from the non-user stuff, but even from user-related 'attacks' like answering the door for malware when it goes knocking. I hooked them up with OpenDNS. I enabled the web filter. I went with the Custom configuration on the web filter enabling protection from Adware, P2P/File share sites, Dating sites, Nudity, Pornography, Proxy/Anonymizer, and Web Spam. OpenDNS also has basic malare/botnet protection too which helps.
Then, I installed the Web of Trust addon for Internet Explorer and Firefox. Web of Trust is a terrific broswer add-on rating websites to give you an idea of what you're getting into before you visit a site. A small dot next to each link gives you a rating for the site: green is good, yellow is questionable and red is bad.
 If you click on a red rated site WOT will popup asking you if you really
want to visit this site and lists why the site is rated red. This will
scare most users, preventing them from downloading and installing
malware on accident. It's nice. It works.
If you click on a red rated site WOT will popup asking you if you really
want to visit this site and lists why the site is rated red. This will
scare most users, preventing them from downloading and installing
malware on accident. It's nice. It works.
This is how I handled the problem. Do you have a different way? Tell me about it in the comment box below.v
File Restore hides your start menu links and a bunch of other stuff to scare you that your computer is truly broken. We won't restore this stuff in the beginning of the routine though. I wanted to go ahead and tell you so you know why those links are gone in case you have to deal with this beast.
I disabled Microsoft Security Essentials real-time scanner in preparation for Combofix.
I then ran combofix. I ran combofix before Malwarebytes because I know this malware is really nasty and wanted to go in with the big guns first. Don't be scared to run comboxfix. Start the app file, proceed with defaults. It will go through around 50 scans (the speed of the scans depends on your computer's specs - I've seen it go fast, I've seen it take a while - 10 to 60 minutes) then, it will create a log report, then open the log report giving you details on what it did.
Rebooted into safe mode.
Ran Malwarebytes quick scan. It only detected some PUPs. I told Malwarebytes to delete them anyway because it was adware and I wanted to make the system squeaky clean.
Rebooted into normal mode.
Ran Windows Repair. This tool is amazing. File Restore can really mess with the default settings for Windows, thus making it look broken. Windows Repair fixes the stuff malware screws up like that. It's a very nice tool. It automatically reboots after the scan finishes. This scan can take a while too. Again, the speed of the scan depends on the specs of your computer.
Windows was fixed after this routine. I wasn't done yet though. I enabled the real-time scanner for Microsoft Security Essentials. I made sure the quick scan was on a daily schedule. It was. I also wanted to make sure this computer was safe not just from the non-user stuff, but even from user-related 'attacks' like answering the door for malware when it goes knocking. I hooked them up with OpenDNS. I enabled the web filter. I went with the Custom configuration on the web filter enabling protection from Adware, P2P/File share sites, Dating sites, Nudity, Pornography, Proxy/Anonymizer, and Web Spam. OpenDNS also has basic malare/botnet protection too which helps.
Then, I installed the Web of Trust addon for Internet Explorer and Firefox. Web of Trust is a terrific broswer add-on rating websites to give you an idea of what you're getting into before you visit a site. A small dot next to each link gives you a rating for the site: green is good, yellow is questionable and red is bad.

This is how I handled the problem. Do you have a different way? Tell me about it in the comment box below.v
Friday, November 9, 2012
HP All-in-One Black Screen Blinking Cursor at Startup
I got a call from my brother earlier this week. He told me his HP All-in-One computer (brand new by the way) will only display a black screen with a blinking cursor after the blue HP splash screen. At the splash screen he has the option to click the escape key for diagnostics. He said the diagnostics don't solve the problem and asked if I could take a look at it for him. I said sure.
When I arrived at the scene, it's exactly as he told me: black screen, blinking cursor. He was worried about the hardware, but I assured him it most likely isn't his hardware and that if it just happens to be the hardware he still has the safety net of the warranty. I restarted the computer. I hit escape when given the option and waited for the HP diagnostic menu. I checked things out, made sure the boot order was correct, etc. I mostly wanted to check out the hardware diagnostic utility. I ran that and all the hardware passed the tests as I thought they would. I couldn't get into the advanced boot options though due to HP's diagnostic stuff overriding such an option. I wanted to boot into safe mode and check things out. If anyone reading this knows how to override HP's boot utility let me know because it's annoying.
Anyway, I put in the windows 7 disc and got to the recovery console. My hunch was that some malware screwed up the system since Windows wouldn't boot. Keep in mind, I wasn't getting an error message like 'bootmgr failed, couldn't be found, etc." or "ntldr missing." All I had to go off of was the black screen, blinking cursor, which isn't much to go by. My hunch was that the boot files were missing and had to be replaced from the Windows disc.
I booted from the Windows 7 disc. Instead of selecting install, I chose 'repair your computer.' After choosing that option, Windows ran a short scan for startup problems. It detected some problems then asked if I wanted to restart to correct the problems. I went ahead with this option even though my usual skepticism kept me from thinking this would solve the problem. I was right. It didn't solve the problem. I booted back into the recovery console, this time startup repair didn't detect any problems (???), then I went for the command prompt. This is where you want to go for this kind of problem. If you encounter this problem, go to the command prompt and enter the following commands, hitting enter after each command. Make sure and include spacing as spacing is shown.
Bootrec.exe
bcdedit /export C:\BCD_Backup
c:
cd boot
attrib bcd -s -h -r
ren c:\boot\bcd bcd.old
bootrec /RebuildBcd
bootrec /fixmbr
bootrec /fixboot
exit
After these commands, remove the rescue CD then reboot. Your computer should now boot into Windows 7.
We're not out of the woods yet though! I booted into their desktop and what did I see? I saw the File Restore monster. It was "scanning" showing me all of these "problems," a thousand windows were opening a second; it was crazy. Since I had dealt with this monster in the past, I was prepared to slay it this time around. My brother was worried that it was his computer; that it wasn't secure enough. I assured him that this malware only gets in if it's let in. This stuff doesn't get in by brute force. Someone using the computer let it in, by accident of course, but still having an Apple or Ubuntu wouldn't have stopped this.
Anyway, how did I slay the File Restore monster? I'll give you my routine that works. If you have another one, please let me know in the comment box.
File Restore hides your start menu links and a bunch of other stuff to scare you that your computer is truly broken. We won't restore this stuff in the beginning of the routine though. I wanted to go ahead and tell you so you know why those links are gone in case you have to deal with this beast.
I disabled Microsoft Security Essentials real-time scanner in preparation for Combofix.
I then ran combofix. I ran combofix before Malwarebytes because I know this malware is really nasty and wanted to go in with the big guns first. Don't be scared to run comboxfix. Start the app file, proceed with defaults. It will go through around 50 scans (the speed of the scans depends on your computer's specs - I've seen it go fast, I've seen it take a while - 10 to 60 minutes) then, it will create a log report, then open the log report giving you details on what it did.
Rebooted into safe mode.
Ran Malwarebytes quick scan. It only detected some PUPs. I told Malwarebytes to delete them anyway because it was adware and I wanted to make the system squeaky clean.
Rebooted into normal mode.
Ran Windows Repair. This tool is amazing. File Restore can really mess with the default settings for Windows, thus making it look broken. Windows Repair fixes the stuff malware screws up like that. It's a very nice tool. It automatically reboots after the scan finishes. This scan can take a while too. Again, the speed of the scan depends on the specs of your computer.
Windows was fixed after this routine. I wasn't done yet though. I enabled the real-time scanner for Microsoft Security Essentials. I made sure the quick scan was on a daily schedule. It was. I also wanted to make sure this computer was safe not just from the non-user stuff, but even from user-related 'attacks' like answering the door for malware when it goes knocking. I hooked them up with OpenDNS. I enabled the web filter. I went with the Custom configuration on the web filter enabling protection from Adware, P2P/File share sites, Dating sites, Nudity, Pornography, Proxy/Anonymizer, and Web Spam. OpenDNS also has basic malare/botnet protection too which helps.
Then, I installed the Web of Trust addon for Internet Explorer and Firefox. Web of Trust is a terrific broswer add-on rating websites to give you an idea of what you're getting into before you visit a site. A small dot next to each link gives you a rating for the site: green is good, yellow is questionable and red is bad.
If you click on a red rated site WOT will popup asking you if you really want to visit this site and lists why the site is rated red. This will scare most users, preventing them from downloading and installing malware on accident. It's nice. It works.
My brother and his wife were very exited with the work I done for them. They feel better and safer which is good.
This is how I handled the problem. Do you have a different way? Tell me about it in the comment box below.
When I arrived at the scene, it's exactly as he told me: black screen, blinking cursor. He was worried about the hardware, but I assured him it most likely isn't his hardware and that if it just happens to be the hardware he still has the safety net of the warranty. I restarted the computer. I hit escape when given the option and waited for the HP diagnostic menu. I checked things out, made sure the boot order was correct, etc. I mostly wanted to check out the hardware diagnostic utility. I ran that and all the hardware passed the tests as I thought they would. I couldn't get into the advanced boot options though due to HP's diagnostic stuff overriding such an option. I wanted to boot into safe mode and check things out. If anyone reading this knows how to override HP's boot utility let me know because it's annoying.
Anyway, I put in the windows 7 disc and got to the recovery console. My hunch was that some malware screwed up the system since Windows wouldn't boot. Keep in mind, I wasn't getting an error message like 'bootmgr failed, couldn't be found, etc." or "ntldr missing." All I had to go off of was the black screen, blinking cursor, which isn't much to go by. My hunch was that the boot files were missing and had to be replaced from the Windows disc.
I booted from the Windows 7 disc. Instead of selecting install, I chose 'repair your computer.' After choosing that option, Windows ran a short scan for startup problems. It detected some problems then asked if I wanted to restart to correct the problems. I went ahead with this option even though my usual skepticism kept me from thinking this would solve the problem. I was right. It didn't solve the problem. I booted back into the recovery console, this time startup repair didn't detect any problems (???), then I went for the command prompt. This is where you want to go for this kind of problem. If you encounter this problem, go to the command prompt and enter the following commands, hitting enter after each command. Make sure and include spacing as spacing is shown.
Bootrec.exe
bcdedit /export C:\BCD_Backup
c:
cd boot
attrib bcd -s -h -r
ren c:\boot\bcd bcd.old
bootrec /RebuildBcd
bootrec /fixmbr
bootrec /fixboot
exit
After these commands, remove the rescue CD then reboot. Your computer should now boot into Windows 7.
We're not out of the woods yet though! I booted into their desktop and what did I see? I saw the File Restore monster. It was "scanning" showing me all of these "problems," a thousand windows were opening a second; it was crazy. Since I had dealt with this monster in the past, I was prepared to slay it this time around. My brother was worried that it was his computer; that it wasn't secure enough. I assured him that this malware only gets in if it's let in. This stuff doesn't get in by brute force. Someone using the computer let it in, by accident of course, but still having an Apple or Ubuntu wouldn't have stopped this.
Anyway, how did I slay the File Restore monster? I'll give you my routine that works. If you have another one, please let me know in the comment box.
File Restore hides your start menu links and a bunch of other stuff to scare you that your computer is truly broken. We won't restore this stuff in the beginning of the routine though. I wanted to go ahead and tell you so you know why those links are gone in case you have to deal with this beast.
I disabled Microsoft Security Essentials real-time scanner in preparation for Combofix.
I then ran combofix. I ran combofix before Malwarebytes because I know this malware is really nasty and wanted to go in with the big guns first. Don't be scared to run comboxfix. Start the app file, proceed with defaults. It will go through around 50 scans (the speed of the scans depends on your computer's specs - I've seen it go fast, I've seen it take a while - 10 to 60 minutes) then, it will create a log report, then open the log report giving you details on what it did.
Rebooted into safe mode.
Ran Malwarebytes quick scan. It only detected some PUPs. I told Malwarebytes to delete them anyway because it was adware and I wanted to make the system squeaky clean.
Rebooted into normal mode.
Ran Windows Repair. This tool is amazing. File Restore can really mess with the default settings for Windows, thus making it look broken. Windows Repair fixes the stuff malware screws up like that. It's a very nice tool. It automatically reboots after the scan finishes. This scan can take a while too. Again, the speed of the scan depends on the specs of your computer.
Windows was fixed after this routine. I wasn't done yet though. I enabled the real-time scanner for Microsoft Security Essentials. I made sure the quick scan was on a daily schedule. It was. I also wanted to make sure this computer was safe not just from the non-user stuff, but even from user-related 'attacks' like answering the door for malware when it goes knocking. I hooked them up with OpenDNS. I enabled the web filter. I went with the Custom configuration on the web filter enabling protection from Adware, P2P/File share sites, Dating sites, Nudity, Pornography, Proxy/Anonymizer, and Web Spam. OpenDNS also has basic malare/botnet protection too which helps.
Then, I installed the Web of Trust addon for Internet Explorer and Firefox. Web of Trust is a terrific broswer add-on rating websites to give you an idea of what you're getting into before you visit a site. A small dot next to each link gives you a rating for the site: green is good, yellow is questionable and red is bad.
My brother and his wife were very exited with the work I done for them. They feel better and safer which is good.
This is how I handled the problem. Do you have a different way? Tell me about it in the comment box below.
Monday, October 29, 2012
Installing Windows 8 on HP EliteBook 2760p
A client bought Windows 8 Pro. She asked me to install it on her HP EliteBook 2760p. If you're familiar with this device then you know it's a combination device, i.e., a laptop/tablet model with a 360 degree rotation touchscreen monitor connected to a keyboard dock making for a very nice device. The specs are 4 GB ddr3 ram, intel core i5 vPro 3.0 GHz processor, 320 GB hdd running Windows 7 pro.
She didn't want to keep any files. She wanted a clean installation. Since the device doesn't have a dvd drive, I had to copy the install files from the windows 8 pro dvd to my usb drive then run the install from windows explorer. So far, it has been a simple install. Very direct so as to not confuse the user, which makes for a very user friendly install. I was asked if I wanted to install updates, I checked yes. After installing updates, Windows 8 wanted the product key. I decided to give the product key. I was then asked if I wanted to keep any files (all files meaning applications; personal files meaning documents/music/pics; or nothing at all), I checked 'nothing at all.' It checked my environment. After that, I was shown how Windows 8 would be installed. Very simple. In fact, this has been the simplest OS installation in my entire tech life (yes, I've installed linux, apple, and windows operating systems).
I started the install at 10:40. At 11:05 windows was installed. By install, I mean now the only thing left is personalization.
UPDATE 10/31/2012
I've failed to get back to this post for update. During personalization, I didn't attempt to use the touch screen. Well, when I tried to use 'touch' it wouldn't work. The touch screen was not functional. I went to device manager to see if there were any problems and yes, there were. So, I went to HP, found the elitebook 2760p, then installed the chipset driver. After the install, the touch screen functioned and all was well with the elitebook.
Ge the drivers for the elitebook
HP Elitebook 2760p drivers (the windows 7 64 bit driver works for Windows 8 Pro)
Wednesday, October 24, 2012
Resources on Windows 8
It's coming. Two days until it's here. What am I talking about? Why, I'm talking about Windows 8. It's a sexy beast and you're going to need to know about it because it's the next big thing.
Windows 8 Resources
Free ebook from Microsoft Press: Introducing Windows 8
Free videos from Total Seminars' Mike Myers on Windows 8
My IT Forum's best Windows 8 Resources
Enjoy!
Windows 8 Resources
Free ebook from Microsoft Press: Introducing Windows 8
Free videos from Total Seminars' Mike Myers on Windows 8
My IT Forum's best Windows 8 Resources
Enjoy!
Tuesday, October 23, 2012
My internet broke! What do I do?

You've heard it many times. You get the call from an employee, family member, or friend (sometimes all three-shudder) telling you something like, "I can't get on the internet. Help!" This will vary depending on your crisis stricken caller's techie-ness, of course, but they're basically telling you, "Hey, my internet is broke. Fix it. Now. I need to check my [insert preferred social media site here], then my email, then youtube to watch funny animals and people falling down, then some gossip columns, then amazon."
What do you do?
I remember in college and during my CompTIA studies that the number one, most important thing you do before anything else is interrogate the person you're helping. What were you doing when this happened? What was the last program you used? Did you hear any noises? Did any error messages pop up on the screen? And so on. That's important, sure, but that kind of approach really depends on the person doesn't it? In my experience the bulk of persons tell me what they can't do and then leave me. I used to try and ask questions, but those questions got me nowhere fast or slow. My approach is to ask the person what they can't do and what they want to be able to do. Quick. Simple. Then the person can leave while I try to make that happen.
To fix the "internet is broke" problem we'll make a list. This list I use at for home users and business users.
Determine environment
Is this PC a member of a domain? Is it a type of server? Is it workgroup PC? Is it a stand-alone PC? This is the number one thing to find out. If it's a stand-alone PC then you won't have to go through as many tasks as a PC that is a member of an active directory domain, right?
Renew the IP address
First and foremost, the easiest fix may be renewing the IP address if it's a device that utilizes DHCP. To determine if it is go the command prompt ( start, run cmd.exe for XP users, start search cmd, click on cmd for vista and above users) and enter the following command: ipconfig /all Look for the word 'DHCP Enabled' You should see to the right of that a 'Yes' or 'No.'
If DHCP is enabled, then run the following commands while still in the command prompt: ipconfig /release then ipconfig /renew This could fix the problem
Flush the DNS cache
DNS is darn important for web browsing. Let me say that again: DNS is darn important for web browsing. When a person looks up sites on the internet your device keeps a record of the DNS "stuff" for that site in some files on your device for quicker lookup time when you visit the site again. Sometimes, the DNS information (cache for us techies) stored on your device can get "messed up" (corrupted, no longer valid information) and this can cause you to not be able to visit certain sites. Well, this can be fixed. While a simple reboot can do the trick, entering following command at the command prompt is quicker: ipconfig /flushdns If successful the cmd prompt will return the following: Windows IP Configuration Successfully flushed the DNS Resolver Cache
Now, this method will work for a stand-alone PC, but what if the PC is a networked PC? For example, if it's a PC connected to a router. Well, the router also has a DNS cache. If that is corrupted, then it needs to be fixed. Reboot (turn off, then turn on) the router to fix the problem.
What if the PC is connected to a domain that has a DNS Server? The DNS server also has a DNS cache. How do you clear the DNS cache on a Windows DNS server?
- Open DNS in your Windows Server
- In the tree click on the DNS server(s)
- On the action menu (or right clicked menu), click clear cache.
These steps work for IE 7, 8, and 9.
In IE, go to Tools > Options
The Options windows opens. Click on Advanced. You should see a Reset button in the lower right portion of the window under a heading that reads, "Reset Internet Explorer Settings." Click on the Reset button.
In the Reset Internet Explorer Settings Dialog box, click on the Reset button.
After a little bit, IE will be return to the default state.
Dive Into the Windows firewall configuration
For Windows 7 users, click start and in the search bar type 'windows firewall' then click enter. For Windows XP users go to control panel then find Windows Firewall.
Try disabling rules/exceptions one at a time, checking internet searching after disabling each one. You might find that a certain rule/exception is blocking internet all together or certain sites.
Reset TCP/IP
If you can't connect to the internet, the TCP/IP protocol may be corrupted. If it is, then you'll need to reset this protocol using the netsh utility via command prompt logged in as an admin.
1. Open command prompt as an admin (start, run cmd.exe for XP users, start search cmd, right click cmd, run as admin for vista and above users).
2. At the command prompt, enter the following command and then press ENTER: netsh int ip reset c:\resetlog.txt By the way, you don't have to specify a directory path for the log file. If you don't want to, drop the "c:\" from the "resetlog.txt" portion of the command.
3. Reboot the computer.
Repair Winsock
If resetting TCP/IP didn't work, for example, if you're still getting "page cannot be displayed" when trying to access a site, or if Filezilla isn't working correctly then it may be a Winsock problem. Run the following command in command prompt as an admin to repair winsock netsh winsock reset catalog After repairing winsock (you're taking it back to default configurations) you may, MAY, have to reinstall services that use winsock.
Reset the default hosts file *copied and pasted from Microsoft*
To reset the Hosts file back to the default, follow these steps:
- Click Start, click Run, type %systemroot% \system32\drivers\etc, and then click OK.
- Rename the Hosts file to Hosts.old.
- Create a new default hosts file. To do this, follow these steps:
- Right-click an open space in the %WinDir%\System32\Drivers\Etc folder, point to New, click Text Document, type hosts, and then press Enter.
- Click Yes to confirm that the file name extension will not be .txt.
- Open the new Hosts file in a text editor. For example, open the file in Notepad.
- Copy the following text to the file:
For Windows XP or for Windows Server 2003For Windows Vista or for Windows Server 2008# Copyright (c) 1993-1999 Microsoft Corp. # # This is a sample HOSTS file used by Microsoft TCP/IP for Windows. # # This file contains the mappings of IP addresses to host names. Each # entry should be kept on an individual line. The IP address should # be placed in the first column followed by the corresponding host name. # The IP address and the host name should be separated by at least one # space. # # Additionally, comments (such as these) may be inserted on individual # lines or following the machine name denoted by a '#' symbol. # # For example: # # 102.54.94.97 rhino.acme.com # source server # 38.25.63.10 x.acme.com # x client host 127.0.0.1 localhost
For Windows 7# Copyright (c) 1993-2006 Microsoft Corp. # # This is a sample HOSTS file used by Microsoft TCP/IP for Windows. # # This file contains the mappings of IP addresses to host names. Each # entry should be kept on an individual line. The IP address should # be placed in the first column followed by the corresponding host name. # The IP address and the host name should be separated by at least one # space. # # Additionally, comments (such as these) may be inserted on individual # lines or following the machine name denoted by a '#' symbol. # # For example: # # 102.54.94.97 rhino.acme.com # source server # 38.25.63.10 x.acme.com # x client host 127.0.0.1 localhost ::1 localhost
# Copyright (c) 1993-2006 Microsoft Corp.
#
# This is a sample HOSTS file used by Microsoft TCP/IP for Windows.
#
# This file contains the mappings of IP addresses to host names. Each
# entry should be kept on an individual line. The IP address should
# be placed in the first column followed by the corresponding host name.
# The IP address and the host name should be separated by at least one
# space.
#
# Additionally, comments (such as these) may be inserted on individual
# lines or following the machine name denoted by a '#' symbol.
#
# For example:
#
#      102.54.94.97     rhino.acme.com          # source server
#       38.25.63.10     x.acme.com              # x client host

# localhost name resolution is handle within DNS itself.
#       127.0.0.1       localhost
#       ::1             localhost
- Save and then close the file.
If this PC is connected to a network then the problem may very well be another PC or device causing the internet problem. Doing the above suggestions all day long won't fix the issue if another device on the network is the culprit.
Monday, October 15, 2012
How to Use Google Maps on iOS6
Have you heard? No Google maps app on Apple iPhone's iOS6. Yep. That's right. This makes sense for Google, of course, because Google is in competition with Apple. Basically Google is saying, "Hey, competitor, make your own mapping app." While the Google maps app is not available for the iphone, there is a workaround so don't despair. No, it's not the app, but it's still google maps.
Go to Safari. Type in Google in the address bar. Once you're there, click on "maps." You might be asked by the browser if you'd like to add a shortcut icon to your home screen. Do it and now you'll be able to access Google maps on your newly updated iphone. No, it's not perfect and accessing Google maps through the web isn't as fluid as the app version; however, currently, this is the only way to use Google maps on your iOS6 smartphone.
Go to Safari. Type in Google in the address bar. Once you're there, click on "maps." You might be asked by the browser if you'd like to add a shortcut icon to your home screen. Do it and now you'll be able to access Google maps on your newly updated iphone. No, it's not perfect and accessing Google maps through the web isn't as fluid as the app version; however, currently, this is the only way to use Google maps on your iOS6 smartphone.
Wednesday, October 10, 2012
Change the Interface DHCP Lease Is Bound To in Sonicwall
* Note: this blog post is about Sonicwall firmware version
"SonicOS Enhanced 5.8.1.5-46o"
So you've went through the VPN wizard. It's running. You have people using it. It's great. Oh wait! What's that? In your security log you see "attacks" labeled as "IP Spoof." Looking at the log, it shows the user logging in on interface X0, but their IP on your network is a X2 address. Sonicwall thinks it is an IP spoof. You see the external IP. You recognize the external IP is from one of your remote sites. It's no threat, but you would like for Sonicwall to not log it anymore. How do you fix it? I'm glad you asked.
Example setup.
X0\ LAN\ Static\ 192.168.10.XXXX\ you use this for DHCP for your wifi users
X1\WAN
X2\ LAN\ Static\ 192.168.1.XXXX\ this is your production network that doesn't utilize DHCP every user on this network has a static IP
In your VPN setup, Sonicwall binds the DHCP lease to the interface that uses DHCP (genius idea right?). So you've built this VPN connection. On the client's machine, you install the Sonicwall VPN client software to connect to the network. You want her to be on the production network though, so you change the virtual adapter the Sonicwall client uses on her machine to a 192.168.1. address. Now, she is able to access production network resources like she wanted. Great.
Back home, you see in the security logs, the IP Spoof stuff. How is that fixed? In the Sonicwall admin panel, go to VPN\DHCP over VPN. Click the dropdown box, select Remote Gateway then click configure.

You should see the following, "DHCP Lease Bound To:" and a dropdown box next to that with the various interfaces. Following our example above, choose the X2 interface so the client will be on the production network when logged in using the VPN.
 Then click OK. You might see a goofy red message, but it won't keep you from making the change to the DHCP lease binding.
So you've went through the VPN wizard. It's running. You have people using it. It's great. Oh wait! What's that? In your security log you see "attacks" labeled as "IP Spoof." Looking at the log, it shows the user logging in on interface X0, but their IP on your network is a X2 address. Sonicwall thinks it is an IP spoof. You see the external IP. You recognize the external IP is from one of your remote sites. It's no threat, but you would like for Sonicwall to not log it anymore. How do you fix it? I'm glad you asked.
Example setup.
X0\ LAN\ Static\ 192.168.10.XXXX\ you use this for DHCP for your wifi users
X1\WAN
X2\ LAN\ Static\ 192.168.1.XXXX\ this is your production network that doesn't utilize DHCP every user on this network has a static IP
In your VPN setup, Sonicwall binds the DHCP lease to the interface that uses DHCP (genius idea right?). So you've built this VPN connection. On the client's machine, you install the Sonicwall VPN client software to connect to the network. You want her to be on the production network though, so you change the virtual adapter the Sonicwall client uses on her machine to a 192.168.1. address. Now, she is able to access production network resources like she wanted. Great.
Back home, you see in the security logs, the IP Spoof stuff. How is that fixed? In the Sonicwall admin panel, go to VPN\DHCP over VPN. Click the dropdown box, select Remote Gateway then click configure.

You should see the following, "DHCP Lease Bound To:" and a dropdown box next to that with the various interfaces. Following our example above, choose the X2 interface so the client will be on the production network when logged in using the VPN.

Tuesday, October 9, 2012
Hardware Firewall Is a Must
From TechRepublic's recent "10 Things" blog:
6: Deploy a hardware-based firewall Let’s face it: The built-in Windows firewall is simply not sufficient. If you want real security, you need a dedicated firewall on your network. This firewall will be a single point of entry that will stop many more attempted breaches than the standard software-based firewall will. Besides, the hardware-based fire will be far more flexible and customizable. Look at a Cisco, Sonicwall, or Fortinet hardware firewall as your primary protection.
This is an excellent, excellent, (did I say excellent?) recommendation. If you or your business is connected straight to your modem without any border protection from the external world then you're in jeopardy and by jeopardy I don't mean the game show, I mean trouble. Why? Because your PC or group of PCs have an external IP. Your device doesn't have a bouncer to keep the bad guys and crap out of your house. You don't have that extra layer of protection that a connected device needs to operate more securely. Now, don't think a hardware firewall will make you invincible. I don't want to paint the wrong picture. I do mean to say that a hardware based firewall along with other security measures can make you more secure.
 What are the benefits of a hardware based firewall?
1. NAT
*cue hissing* Some techs don't think NAT is a security feature, but I do. There is some mystery regarding NAT. Was it meant for security? Was it not meant for security? I think it's up in the air. Even so, I think it's fair to say that NAT gives *some* security in that it gives your device a local IP instead of your public, external IP. Intruders, the green ones conservatively speaking, won't know your device's IP which does help. No, it's not a super excellent security feature, but it's just another layer of protection that is nice to have while we're still mostly in a IPv4 world.
2. Rules
With a hardware based firewall, you can make firewall rules which are rules that you create to allow the traffic you want coming in and leaving your network. You can make as many or as little rules as you like. Don't want RDP sessions coming in to your network? Block it. Don't like WMI packets coming in? Block those too. It's customizable. Some techs start by blocking everything then slowly unblocking ports as the days progress. For example, a tech had most ports blocked. He downloaded WoW was able to run some of it, then realized he needed to open certain ports for the game, so he did. That's what I mean by some techs block everything, then slowly open ports when the situation occurs. You don't need everything open right out of the gate. Only open ports that you need open.
3. Logs
Yeah, Windows and other OSs have log views, they're limited to your system though. With a hardware firewall you'll have logs informing you who and what was trying to access your network. You'll see your rules working. You'll see intrusions prevented, this app allowed, another app blocked and so on. It's helpful. It's encouraging. You can see your firewall at work or not at work. You'll see what's getting in, out, and blocked. Those are three reasons I can think of right away for getting a hardware firewall. You don't have to spend hundreds of dollars on a hardware firewall either. Routers come equipped with firewalls. For my home I use a Netgear wireless router that is excellent for my home setup. The firewall provides good protection, customization, and it's easy to use. Buy one.
Netgear WNR3500L this link gives you the specs and has links to the stores it's sold at.
* I didn't make the image used in this blog post. I found it in a google search from this website.
6: Deploy a hardware-based firewall Let’s face it: The built-in Windows firewall is simply not sufficient. If you want real security, you need a dedicated firewall on your network. This firewall will be a single point of entry that will stop many more attempted breaches than the standard software-based firewall will. Besides, the hardware-based fire will be far more flexible and customizable. Look at a Cisco, Sonicwall, or Fortinet hardware firewall as your primary protection.
This is an excellent, excellent, (did I say excellent?) recommendation. If you or your business is connected straight to your modem without any border protection from the external world then you're in jeopardy and by jeopardy I don't mean the game show, I mean trouble. Why? Because your PC or group of PCs have an external IP. Your device doesn't have a bouncer to keep the bad guys and crap out of your house. You don't have that extra layer of protection that a connected device needs to operate more securely. Now, don't think a hardware firewall will make you invincible. I don't want to paint the wrong picture. I do mean to say that a hardware based firewall along with other security measures can make you more secure.
1. NAT
*cue hissing* Some techs don't think NAT is a security feature, but I do. There is some mystery regarding NAT. Was it meant for security? Was it not meant for security? I think it's up in the air. Even so, I think it's fair to say that NAT gives *some* security in that it gives your device a local IP instead of your public, external IP. Intruders, the green ones conservatively speaking, won't know your device's IP which does help. No, it's not a super excellent security feature, but it's just another layer of protection that is nice to have while we're still mostly in a IPv4 world.
2. Rules
With a hardware based firewall, you can make firewall rules which are rules that you create to allow the traffic you want coming in and leaving your network. You can make as many or as little rules as you like. Don't want RDP sessions coming in to your network? Block it. Don't like WMI packets coming in? Block those too. It's customizable. Some techs start by blocking everything then slowly unblocking ports as the days progress. For example, a tech had most ports blocked. He downloaded WoW was able to run some of it, then realized he needed to open certain ports for the game, so he did. That's what I mean by some techs block everything, then slowly open ports when the situation occurs. You don't need everything open right out of the gate. Only open ports that you need open.
3. Logs
Yeah, Windows and other OSs have log views, they're limited to your system though. With a hardware firewall you'll have logs informing you who and what was trying to access your network. You'll see your rules working. You'll see intrusions prevented, this app allowed, another app blocked and so on. It's helpful. It's encouraging. You can see your firewall at work or not at work. You'll see what's getting in, out, and blocked. Those are three reasons I can think of right away for getting a hardware firewall. You don't have to spend hundreds of dollars on a hardware firewall either. Routers come equipped with firewalls. For my home I use a Netgear wireless router that is excellent for my home setup. The firewall provides good protection, customization, and it's easy to use. Buy one.
Netgear WNR3500L this link gives you the specs and has links to the stores it's sold at.
* I didn't make the image used in this blog post. I found it in a google search from this website.
Thursday, September 27, 2012
How to Install Microsoft Security Essentials
Ok. Here we go. This is the best real-time antivirus scanner around. AVast! comes in second, but MSE is lightweight and knows Windows better than any other antivirus sytem.
First things first. Uninstall your "old" scanner. I don't know which one you had so I'll just use Norton as an example.
Click on the start button (the windows logo located at the bottom left of your screen on the task bar).
In the search bar, type 'programs and features' then click on the programs and features icon.

in the programs and features windows, find Norton (or whatever antivirus you already have installed), single click on it, then click uninstall (it's located between organize and change)
Follow the uninstall process.
Reboot if necessary.
Now, click on the following link http://windows.microsoft.com/en-US/windows/products/security-essentials
select your version of windows 7 (most likely 64 bit)
 click on download.
Save the file.
Then run the file.
Take the defaults.
If all goes well, you'll soon be protected from malware by MSE. Yay you!
First things first. Uninstall your "old" scanner. I don't know which one you had so I'll just use Norton as an example.
Click on the start button (the windows logo located at the bottom left of your screen on the task bar).
In the search bar, type 'programs and features' then click on the programs and features icon.

in the programs and features windows, find Norton (or whatever antivirus you already have installed), single click on it, then click uninstall (it's located between organize and change)
Follow the uninstall process.
Reboot if necessary.
Now, click on the following link http://windows.microsoft.com/en-US/windows/products/security-essentials
select your version of windows 7 (most likely 64 bit)
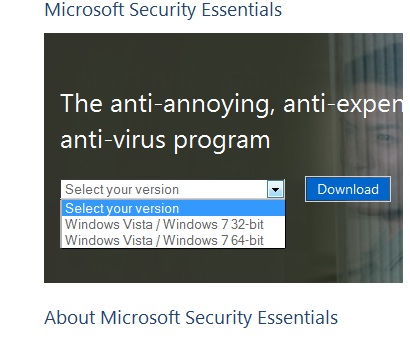
Save the file.
Then run the file.
Take the defaults.
If all goes well, you'll soon be protected from malware by MSE. Yay you!
Monday, September 17, 2012
Try Everything Before You Quit - How to Reset Internet Explorer
No, this isn't a good philosophy for life, but it is a good philosophy for technology repair.
A client told me she was bringing in her mother's PC for me to fix. Her mom has att.yahoo as her homepage in Internet Explorer 8. Apparently, ATT at Yahoo! has changed the look and feel of their homepage (new code and stuff). Since that change, my client's mom can't access the att.yahoo page. She has the site set as her homepage in IE 8. When she starts IE 8, the infinity circle runs for 5+ minutes (she let it run without closing it out and she said only a tiny picture had loaded after 15 minutes). Well, my client brought in the PC for me to check out. I asked her if she had opened a new tab in IE 8 to try and access another site. She said, "No, I didn't try that." So, that was the first thing I did after booting into Windows.
I was able to open google and do a google search (I searched pizza if you're wondering). I was also able to open Yahoo!. From that, I knew IE 8 wasn't hijacked by a browser hijacker or something else. During the opening of other sites, att.yahoo was still trying to load. I closed the att.yahoo tab, then I installed Firefox, ran it, and was able to access att.yahoo just fine in Firefox. My assumption that IE 8 was "just old" and that att.yahoo's new homepage was too "advanced" for IE 8 was beginning to be a reality for me.
I told my client that Firefox loaded site just fine and that IE 9 probably would too. I asked her if she wanted me to update IE 8 to 9. She gave me the green light because she thought IE 9 would at least be more familiar to her mom than Firefox and I thought that was probably true. So, I installed IE 9. Guess what? IE 9 had trouble loading the new homepage too. What? Honestly, I was stumped. Another thought came to mind though. Perhaps IE was broken in some way? Maybe a reset would fix this issue? So that's what I did. I ran the IE reset. Guess what? Att.yahoo loaded just fine, even the same speed as Firefox. I don't know what specifically the problem was between IE and att.yahoo's new homepage, but I do know running the IE reset fixed the issue. I wonder if the IE reset in IE 8 would have fixed the issue for 8? That question ties in the title post that you should try everything before you quit on the technology you're working on. I should have tried the IE reset before upgrading to IE 9.
Want to know how to run the IE reset? These steps work for IE 7, 8, and 9.
In IE, go to Tools > Options
The Options windows opens. Click on Advanced. You should see a Reset button in the lower right portion of the window under a heading that reads, "Reset Internet Explorer Settings." Click on the Reset button.
In the Reset Internet Explorer Settings Dialog box, click on the Reset button.
After a little bit, IE will be return to the default state.
Friday, September 14, 2012
Dropbox says not enough space, but there is plenty of space
So you have 30 MB left in Dropbox storage. You try to store a 20 MB file in the Dropbox folder in your (windows) explorer and get a message like: Can't sync examplefile.xxx...out of space in your Dropbox Oh no! What do you do? Two solutions that may solve your problem.
This may sound like a stupid question, but do
you have enough space on your physical drive? Since Dropbox acts as a
folder on your physical drive there has to be enough space on that drive
as well for it to sync and for it to be stored in your Dropbox folder.
Have you cleared the Dropbox cache? This is the path in Windows Explorer (assuming you're using Windows 7)
I hope one of these helps.
Have you cleared the Dropbox cache? This is the path in Windows Explorer (assuming you're using Windows 7)
%HOMEPATH%\Dropbox\.dropbox.cache
type that line in the location bar in Windows Explorer and it should
take you to the dropbox cache folder. I think the cache folder is deleted
automatically every 3 days, but if you just recently deleted a lot of
files this could be taking up valuable space in your dropbox folder.I hope one of these helps.
Thursday, August 30, 2012
Create an Alternate HTTPS port in Sonicwall
For my new project with Remote Desktop Services, specifically Remote Apps offered externally to our network, I had to create an alternate HTTPS port in my Sonicwall TZ210 because we couldn't afford a new external IP (politics). Anyway, here's what you do.
Login to your Sonicwall appliance. In the left column, under network, click on Services. You're now in the Services section. Under Services, click on "add." The Add window opens allowing you to create your service. You should have fields for name, protocol, port range, and sub-type. After you've named your Service, select TCP for IP type and now put in the port range you want. For this setup, you probably only want one port number, so the range fields need the same number, e.g. beginning 1500 and ending with 1500. Click Add and you're done.
Just above Services is Service Groups. Click on Add Group. The Add Group window will open and you can customize your Service Group (I labeled mine <server name> RD Web). After you've named it, find the Service you created and add the Service to your Service Group. Click OK and you're done. You've created the alternate port for 443!
This is how you should feel after this accomplishment. Celebrate by yelling and beating your chest.
Tuesday, August 21, 2012
Issues with camera system
At work we have a 12 camera Geovision surveillance system that runs a TCP/IP service allowing LAN users to access the system and a Web service allowing authorized WAN users/devices to access the system from outside our network. This has been in place for at least 2 years now. Well, the other day I decided to access the system from home to see if our PTZ camera was working (I had heard a complaint). I couldn't connect. More specifically, using the external IP and the port number only resulted with Google telling me it couldn't find anything related to such madness. Curious, I contacted my boss and asked him the last time he accessed the system from his iPad (geovision app). He told me it had been a long time and to not worry about fixing the problem until the next day at work. Cool.
When I arrived at work I checked the following, but I didn't follow my policy of starting with external then going internal; if I had, then I would have fixed the issue sooner. What I did was start the complete opposite. Doh!
What I did
Began with the camera server. I checked the local firewall settings. Windows Firewall was on and allowing exceptions. I had all of the correct exceptions checked too. I then moved to turning off the local firewall on the camera server and accessing externally, but that didn't work. The Web Cam service was running also on the camera server. So, no problem with that device.
I then move to what I should have checked to begin with: Sonicwall. I checked the access rules, but I didn't see anything out of the ordinary. Everything we use was right there in the list. I then go to the NAT policies. Ah-ha! I see an odd NAT service called "our server name"-services with http and https. What? My comment on the NAT rule sucked too: sick/vacation. That didn't make sense to me because I had the correct mail server stuff running and I couldn't imagine why this NAT rule could be used for mail server stuff. My geovision services use http (8080) for the web access and this random NAT service also using 8080 was conflicting with the geovision service, which is why we couldn't access the camera system externally. I turned off the random NAT rule, tried the web cam externally and like a charm I was able to access the camera system. It wasn't cheer time just yet though because I had to make sure our mail service with our employee self-service system was still running with that random NAT service turned off. I tried it out and yes, it still worked.
What did I learn from this experience? I learned a few things (things I already know, but haven't put into habitual practice yet - FAIL).
1. Work from external to internal. Working this way keeps things simple because it's easy to get the external stuff out of the way first since there aren't as many things external as there are internal.
2. Document clearly. Even non-firewall things need to be documented clearly. When you're doing something at your work leave notes on why you're doing this or doing that. I have no idea why I made that NAT rule and the comment didn't help me at all. I was testing something, but failed to turn it back off. If I had documented clearly then I would have known the purpose of that NAT rule.
3. When you turn a service off or on or replace/whatever make sure your production services are running just as they should be. You know you've done something right when the only thing the employees notice is the new thing they were expecting or nothing at all after your network project.
Monday, August 20, 2012
Windows 8 Shortcut Keys and Start Screen Editing
Stepping Into The Windows 8 Pool Part 2
Ah yes. You feel the breeze? It's nice isn't it? The water is feeling good. You're relaxed just hanging out on the steps in the shallow end of the pool when suddenly you're beaned in the head with a volleyball. You look around for the attacker and you realize it came from that annoying kid in the pool named "Finance App." You've heard about him. He's annoying. Sticking his tongue out at you. Making jokes and being all financey and stuff. Well, there's something we can do about that. If you cool down, stay calm, and hangout with me for a second I'll let you know how. I'm about to give you a rundown on some Start Screen Basics. Here we go.
La-la-laaaa! Start Screen Basics
In the last post I wrote about some of the popular Start Screen apps that are pinned to the Start Screen by default. These are apps pre-pinned to appeal to a wide audience. There are some apps here that I don't want on my Start Screen. They're annoying. Telling me about Finance stuff I don't care about or how about that useless Sports app (it's useless because it doesn't include the greatest sport of all time - pro wrestling)? Maybe you are interested in those, which is fine. The steps taken to personalize your Start Screen are universal for all apps whatever you decide to keep, remove, or add. Before we get into that though, we need to learn how to maneuver around the Start Screen first.
Windows 8 Keyboard Shortcuts
TechRepublic blogger Greg Shultz released a Windows 8 keyboard shortcut cheatsheet that included 100, count'em 100, keyboard shortcuts for Windows 8. I'm not going to list all 100 here in this post, but do know that you can download the PDF by clicking here or on the link provided at the end of this post.
Most people love shortcuts. I can't think of a better place to use shortcuts than in a computer because, let's face it, we don't want to take the long way clicking through a long breadcrumb-trail when a simple and fun shortcut can get us there quicker. In this post I'll go over my favorite (since they're my favorite I just know they'll be your favorite) Windows 8 keyboard shortcuts for maneuvering around the Start Screen and then a few more that will be handy for other tasks. So, strap on your seatbelt, ease your seat back, and put into gear because we're about to take off. (was that overly cheesy?)
! note: In case you don't know where the windows key is on the keyboard check out this image

1. Windows Key (from here on WK) = Switch between Metro Start Screen and last accessed app
2. WK + C = Access the Charms bar
3. WK + I = Access the Settings Charm
4. WK + K = Access Devices Charm
5. WK + Q = Access Apps Search Screen
6. WK + F = Access Files Search Screen
7. WK + X = Access Windows Tools Menu
8. WK + E = Open My Computer
9. ESC = Close a Charm
10. WK + CTRL + B = Access a program that is displaying a message in the Notifications Area
Bonus (these aren't for maneuvering around Start, but they're very helpful shortcuts)
CTRL + A = Highlight/Select All Items
CTRL + C = Copy the selected item
CTRL + V = Paste the selected item
CTRL + X = Cut the selected item
CTRL + D = Delete the selected item
CTRL + Z = Undo action
While the entire list is worth checking out, the above shortcuts are ones I highly recommend committing to memory because you'll be accessing these places often and learning the above shortcuts will help you be more efficient. Now, let's personalize this sucker.
Personalization
Now we're into the subjective side of things. I'll go over trimming and expanding the "stuff" on your Start Screen then color and design.
Right-click on one of your large apps (by large I mean rectangle) and look at the options that appear at the bottom of your screen. You have the option to make the app smaller. Click on "smaller" and see what happens. Da-da! It's now a square instead of a rectangle. Right-click on the same app and now the option to make it larger is available.
Now, let's eliminate some of the apps that will never be used on the Start Screen. For my experience, the app I'll unpin for this example will be the finance app and a few others I know I won't use. Right-click on the Finance app. The options available are: unpin from start, uninstall, smaller, and turn live tile off. It's not taking up too much space and there's a possibility I might want to use it in the future so I'll just unpin it from the Start Screen. If I knew for certain I wouldn't ever use it then I would have went with uninstall. To add an app to the Start Screen there are a few ways. I will go with the "from the Start Screen..." way since this section is on the Start Screen. Right-click in a blank area. Click on "all apps" to show all the apps. Right-Click on "command prompt" for this example and look at the options below. Click on "pin to start." Now click the WK to go back to the start screen. Hey check it out! Our app is on the Start Screen. If it's not in the location you want it to be in then click and hold the app and drag it to the position you want it on your Start Screen. Personally, I moved the desktop tile to the top left of the tile arrangements so when I boot up I can just press enter to start the desktop. Tweak the app tiles to what you like.

Let's go over color and background design. Use the key combination to bring up the charm settings (WK+I if you forgot) then click on "Change PC Settings." Once the window opens, click on "start screen." Now, you can change the background design and color of your Start Screen. When you've decided on your choices, go back to the Start Screen by pressing the WK.

There are still some personalization tips I want to go over, but I'll do that in the next post since this one is going on a little bit too long.
Related Post
Stepping into the Windows 8 Pool
Thursday, August 16, 2012
Stepping into the Windows 8 pool part 1
This is the first post in a series of posts on what I call "stepping into the Windows 8 pool." The water is a little cold, but once you get in slowly, move around the shallow end for a little bit, eventually you'll wade out into the deep end and appreciate the Windows 8 pool. I promise the water isn't as murky as what your Windows 8 naysayer friends tell you. It's fresh. It's clean. Hey, there's even a guy up on the side of the pool grilling a few hot dogs and hamburgers for you when you get hungry after a few laps of swimming. So suit up (or suit down if you're frisky) and step into the pool. I'll be there holding your hand as you step in, well, maybe I won't hold your hand, but rest assure I'll be there to laugh at--er--help you if you fall in on your way down the steps.
You're looking around the pool. You see the people splashing, laughing, and having a good time. The entire scene at first glance looks fun and it's drawing you in, but after a longer stare you do notice a few things that look, well, odd like the overweight lady wearing the g-string bikini (not that there's anything wrong with that), that "one" guy wearing a thong, and the two-headed dog (what? How is that possible?); that's Windows 8 my friend. At first glance it looks beautiful, fun, and the Siren's song is luring you in. I'm not saying Windows 8 isn't beautiful and fun, but after a longer look there are few things that some folks might find odd for a Windows system. Just like the odd sights at the pool, the odd things with Windows 8 are indeed odd at first, however, after a while they're fun, entertaining and you want to keep them around. What do you notice first about Windows 8? If you're like me, you notice the funky screen with tiles all over the place! What's up with that? Well, that's the "start" screen. The Start screen has replaced the traditional start button. It's true, it's true. The Start button is no more. In Windows 8 the Start button has transformed into the Start screen. Love it or hate it, the Start screen is here and it's actually not that bad of an idea considering most people are used to a tile screen of some flavor because of smartphones. Whatever smartphone you use (Windows phone, Android, Apple) you're "home" screen or "start" screen is a collection of your apps represented as some kind of icon or tile, which is what Microsoft has done with their start screen. I think of it as an approach at integrating the user's devices which is something I'll go over later on in this series.
When Windows 8 has booted to the start screen for the first time you're looking at the default tile arrangement. The tiles can be customized, but before I go into the steps of deleting and adding tiles and the basics of the Start Screen I want to go over some of the tiles that are there by default.

When first clicked, you'll be asked to type in your Microsoft account (hotmail/live email and password). This is the account Windows 8 will use to sync your email, calendar, and people data with its Mail, Calendar, and People apps. After setup, you'll be taken to the Mail app. The design and feel is the same kind of design and feel that runs through all of Windows 8: simple, functional and stylish. Microsoft took a simplistic approach with this OS and I like it. The layout is traditional of most Mail apps: mail folders on the left, collection of mail in the selected folder in the middle, then the opened email on the right. When an email is selected, you have three options in the top right: new (a plus sign), respond (a left arrow and enveolope), and delete (a trash can). If you right-click the bottom of the screen some options emerge: move (move the selected email to another folder), pin-to-start, sync, and mark as unread.
I personally think this app is very cool. I first used it on my Windows Phone and fell in love with it. Once in the app, you'll see a listing of your "people," i.e. your collected contacts from email and social sites. Depending on how you're synced, there will be different data visible. There are three headings: people, what's new, and me. At the far left is a sidebar with different accounts that you're connected to and/or you can connect to, e.g. facebook, twitter, outlook. I want to stop talking specifically about the people app here and note that if you want to go back to an app screen hover your mouse in the very top left of the app screen you're in until you see a small square of the previous app and then click on it; you'll be taken to the previous app. Cool huh? OK, back to the people app. Clicking on a person's name/picture will bring up their profile. Depending on your synced is what you'll see. You'll have options such as: send email, write on wall, etc. Whatever the person shares on social sites will be visible here in the profile, which is interesting. Wondering when person a's birthday is? Well if said person has shared it on a social site and you have 8 synced with that social site you'll be able to find out by going to the People App. Right-clicking the People App will bring up options down south like add a new contact and an option to show contacts who are online only, which means just show contacts who've been added from your synced accounts instead of contacts you've added manually and locally.

The What's New section displays a newsfeed of all the latest and greatest from your people's updates from all of the social feeds you're synced and they're synced with. It's good stuff indeed. The Me section is your profile. Whatever you've shared on social sites or on your Microsoft Account will appear here. The right-click function is an edit feature which will take you to Windows Live for editing.
This App will sync whatever communication apps you allow it too, e.g. Facebook chat, Messenger, etc. This is where you can chat with your pals about the new stuff in whatever it is you and your pals chat about. The right-click function here gives the following options: set chat status, invite, and new message.
This tile is an excellent tool. Windows 8's calendar is an above average calendar tool to say the least. The default view is of course the month view. To maneuver around the calender you can scroll and right click to change from month, to day, or to week. Also, right clicking returns the option to add a new event. When "new" is clicked you're taken to a new screen where you can make the details of the new event.

The Photos Tile is, obviously, a hub for all of your pictures locally and online (Facebook, skydrive, Flickr, etc.). The right-click function for this app is simple: import. The default tiles in this app for accessing photos are: pictures library (photos stored locally on your PC), Skydrive photos, Facebook photos, Flickr photos, and a tile called Device (add laptop, phone, TV).

I really like the photo viewer in Windows 8. Want to see all of your photos in a slideshow? 8 does that well. I really like 8's thumbnail view. Since Windows 8 is designed for landscape, the thumbnail viewer is oriented that way too, but 8 doesn't make each thumbnail a square, instead it displays the picture in the orientation it was taken which is very cool. The Photos app is a powerful app in Windows 8. You can sit back and watch your vacation photos on your TV if you want (this also works for movie maker).
Video and Music Apps
If you're used to the Xbox 360 then you'll be comfortable with these apps on windows 8. The right-click function on the home screen of the video/music app gives you "media player" controls and a open file option to open media files. If you have your Microsoft/Live account synced then you can watch videos you've purchased and preview videos. You don't need an account to watch video previews.
 The far left sidebar is the hub for your videos stored locally on your PC or storage device.
The rest of the apps available by default are: weather, Internet Explorer, Maps, Store (the Windows Marketplace), Skydrive, Xbox live games, camera (webcam), Finance, Sports, Travel, and News. Yes, these apps are interesting, but they're mostly self-explanatory and function much like the apps I described above. Right-clicking almost always provides further options. So, click on these apps, explore and enjoy.
The next post is going to be much more interesting as we inch a little further in the pool to learn the basics of the start screen.
First Look
You're looking around the pool. You see the people splashing, laughing, and having a good time. The entire scene at first glance looks fun and it's drawing you in, but after a longer stare you do notice a few things that look, well, odd like the overweight lady wearing the g-string bikini (not that there's anything wrong with that), that "one" guy wearing a thong, and the two-headed dog (what? How is that possible?); that's Windows 8 my friend. At first glance it looks beautiful, fun, and the Siren's song is luring you in. I'm not saying Windows 8 isn't beautiful and fun, but after a longer look there are few things that some folks might find odd for a Windows system. Just like the odd sights at the pool, the odd things with Windows 8 are indeed odd at first, however, after a while they're fun, entertaining and you want to keep them around. What do you notice first about Windows 8? If you're like me, you notice the funky screen with tiles all over the place! What's up with that? Well, that's the "start" screen. The Start screen has replaced the traditional start button. It's true, it's true. The Start button is no more. In Windows 8 the Start button has transformed into the Start screen. Love it or hate it, the Start screen is here and it's actually not that bad of an idea considering most people are used to a tile screen of some flavor because of smartphones. Whatever smartphone you use (Windows phone, Android, Apple) you're "home" screen or "start" screen is a collection of your apps represented as some kind of icon or tile, which is what Microsoft has done with their start screen. I think of it as an approach at integrating the user's devices which is something I'll go over later on in this series.
The Start Screen
When Windows 8 has booted to the start screen for the first time you're looking at the default tile arrangement. The tiles can be customized, but before I go into the steps of deleting and adding tiles and the basics of the Start Screen I want to go over some of the tiles that are there by default.

The Mail App
When first clicked, you'll be asked to type in your Microsoft account (hotmail/live email and password). This is the account Windows 8 will use to sync your email, calendar, and people data with its Mail, Calendar, and People apps. After setup, you'll be taken to the Mail app. The design and feel is the same kind of design and feel that runs through all of Windows 8: simple, functional and stylish. Microsoft took a simplistic approach with this OS and I like it. The layout is traditional of most Mail apps: mail folders on the left, collection of mail in the selected folder in the middle, then the opened email on the right. When an email is selected, you have three options in the top right: new (a plus sign), respond (a left arrow and enveolope), and delete (a trash can). If you right-click the bottom of the screen some options emerge: move (move the selected email to another folder), pin-to-start, sync, and mark as unread.
The People App
I personally think this app is very cool. I first used it on my Windows Phone and fell in love with it. Once in the app, you'll see a listing of your "people," i.e. your collected contacts from email and social sites. Depending on how you're synced, there will be different data visible. There are three headings: people, what's new, and me. At the far left is a sidebar with different accounts that you're connected to and/or you can connect to, e.g. facebook, twitter, outlook. I want to stop talking specifically about the people app here and note that if you want to go back to an app screen hover your mouse in the very top left of the app screen you're in until you see a small square of the previous app and then click on it; you'll be taken to the previous app. Cool huh? OK, back to the people app. Clicking on a person's name/picture will bring up their profile. Depending on your synced is what you'll see. You'll have options such as: send email, write on wall, etc. Whatever the person shares on social sites will be visible here in the profile, which is interesting. Wondering when person a's birthday is? Well if said person has shared it on a social site and you have 8 synced with that social site you'll be able to find out by going to the People App. Right-clicking the People App will bring up options down south like add a new contact and an option to show contacts who are online only, which means just show contacts who've been added from your synced accounts instead of contacts you've added manually and locally.

The What's New section displays a newsfeed of all the latest and greatest from your people's updates from all of the social feeds you're synced and they're synced with. It's good stuff indeed. The Me section is your profile. Whatever you've shared on social sites or on your Microsoft Account will appear here. The right-click function is an edit feature which will take you to Windows Live for editing.
Messaging App
This App will sync whatever communication apps you allow it too, e.g. Facebook chat, Messenger, etc. This is where you can chat with your pals about the new stuff in whatever it is you and your pals chat about. The right-click function here gives the following options: set chat status, invite, and new message.
Calendar App
This tile is an excellent tool. Windows 8's calendar is an above average calendar tool to say the least. The default view is of course the month view. To maneuver around the calender you can scroll and right click to change from month, to day, or to week. Also, right clicking returns the option to add a new event. When "new" is clicked you're taken to a new screen where you can make the details of the new event.

Photos App
The Photos Tile is, obviously, a hub for all of your pictures locally and online (Facebook, skydrive, Flickr, etc.). The right-click function for this app is simple: import. The default tiles in this app for accessing photos are: pictures library (photos stored locally on your PC), Skydrive photos, Facebook photos, Flickr photos, and a tile called Device (add laptop, phone, TV).

Video and Music Apps
If you're used to the Xbox 360 then you'll be comfortable with these apps on windows 8. The right-click function on the home screen of the video/music app gives you "media player" controls and a open file option to open media files. If you have your Microsoft/Live account synced then you can watch videos you've purchased and preview videos. You don't need an account to watch video previews.

...And the Rest
The rest of the apps available by default are: weather, Internet Explorer, Maps, Store (the Windows Marketplace), Skydrive, Xbox live games, camera (webcam), Finance, Sports, Travel, and News. Yes, these apps are interesting, but they're mostly self-explanatory and function much like the apps I described above. Right-clicking almost always provides further options. So, click on these apps, explore and enjoy.
The next post is going to be much more interesting as we inch a little further in the pool to learn the basics of the start screen.
Wednesday, August 15, 2012
Changing PC Settings in Windows 8
Windows 8 will be released October 26, so I thought I would get some of my "to-do" guides here on the blog. I've been testing Windows 8 at work for quite some time now and I haven't ran into any production issues yet. Our production apps run just fine in Windows 8, the only hurdle we'll have (should we decide to use it - we actually have no "need" to upgrade) is user training because Windows 8 is so, so, so different in functionality than previous Windows systems. Anyway, this blog post is on getting to and changing PC settings in Windows 8.
1. When booted into Windows 8, click on the desktop tile.
2. When in the desktop, lower your mouse pointer to the bottom right and wait just a second. A sidebar should appear with icons like "search," "devices," etc.

3. Click on settings. After clicking on settings, a turquoise sidebar will appear with various options. Choose "change PC settings"

4. Now you should see the beautiful PC Settings area for Windows 8. There are many settings to configure.

5. Personalize
You have the option of changing settings for the lock screen, start screen and your account picture. Under lock screen, you can change the lock image from a decent amount of images preloaded on Windows 8 or from your own collection of images. The choice is yours, though it's difficult to beat the gorgeous images that come with Windows 8.
You can also change lock screen apps. These are apps that run in the background and will continue to give you updates while in "locked" mode, e.g. the email app will give you a notification of a new email on your lock screen. The three that run in the background by default are: instant messaging, email, and calendar. You can add more. Some even have the option of giving a detailed status like the calendar app.
Start Screen. The settings for this deal with the background art for the start screen and the color. By default the color is turquoise and has the circle art. You have 6 choices to choose from for the background of the start screen: 5 designs and then the option of no design. The color options offer a healthy amount of choices.
Account Picture. Not much to see here. There is the "browse" button for choosing from pictures currently installed on your PC or you can create an account picture if you have a webcam by using the webcam app.
6. Users
This section deals with user settings for the PC: local and domain. If you're connected to a domain, then you many or may not have privilege to change your domain user settings depending on your domain policies. The first button we see is "connect your Microsoft account" which if chosen will sync your domain settings with your Microsoft account settings. I'm not entirely sure on how this works yet. I've read different things, but my theory is that web-facing apps you personally use will utilize your Microsoft account settings while domain stuff like group policy and such will utilize your domain settings allowing the two settings to work harmoniously together.
The "manage domain users" stuff works like windows 7. When clicked, you will be taken to desktop mode to tinker around with the domain users for the PC. You can also add a user here. When clicked you will be taken through the "add a user" wizard.
7. Notifications
This is a simple section. You can turn on and off notifications for apps and whether notifications are shown at all or in lock screen or heard.
8. Search
You can choose how search works. Turn on or off features like "show the apps I search most often at the top" and "let windows save my searches as future search suggestions." You can delete search history and turn on or off the apps you want to use search.
9. Share
This area is limited. The two top options are turn on or off whether you want to see apps most often used at top and show a list of how you share most often. At the bottom you have two apps to choose from for turning on and off their sharing ability: mail and people. Of course, this a fresh install PC. I don't have many apps installed, I'm sure when the list of apps installed grows more will be populated in this "share" list.
10. General
Usually general settings aren't very fun. They are usually confined to date/time, spelling, language, and such and all of that is here in Windows 8's general settings, but there are two very exciting features here in the general settings: refresh your PC without affecting your files and Reinstall Windows. I'm very excited about these two features. The first option "refreshes" your pc without losing, photos, music, and other personal files (system restore?) and the second option is for staring all over - factory fresh. This is very nice.
11. Privacy
Ah yes the privacy settings. Not much to see here. These are turn on or off functions for the following: apps use my location, let apps access my domain info, and let help improve windows store by sending URLs apps use.
12. Devices
This section gives a list of devices connected your PC locally and via the network. You can also add a device here.
13. Ease of Access
In this section there are on/off functions for making the display and audio better for you. Narration is here, length of time notifications are shown, and cursor thickness.
14. Sync Settings
This section is for users who have settings synced between their local/domain account and Microsoft account. There are many options to choose from: personalize, desktop, passwords, ease of access, language, app settings, browser, and other windows settings.
15. Homegroup
This is for home networks. What's shared, what isn't, and privacy stuff.
16. Windows Update
Check for updates, choose your update method.
I didn't include a screenshot for every setting because that would have been overkill I think. I decided to take a text approach. I did include a screenshot of the main PC settings screen and from that you can probably tell how each section will look and feel. I hope this has been helpful.
1. When booted into Windows 8, click on the desktop tile.
2. When in the desktop, lower your mouse pointer to the bottom right and wait just a second. A sidebar should appear with icons like "search," "devices," etc.
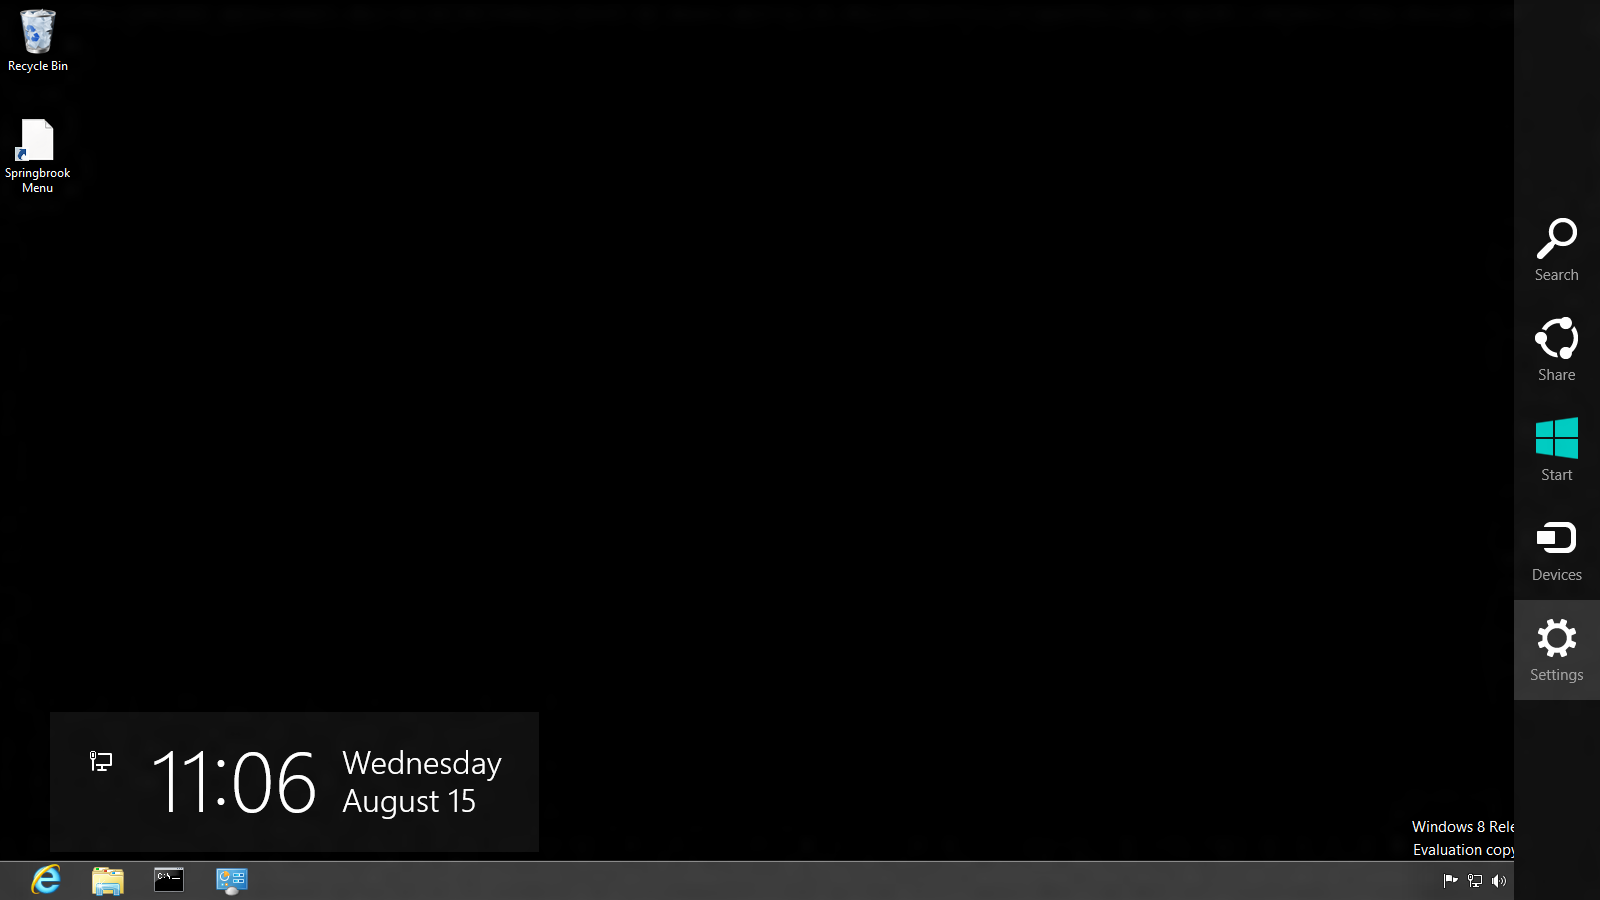
3. Click on settings. After clicking on settings, a turquoise sidebar will appear with various options. Choose "change PC settings"

4. Now you should see the beautiful PC Settings area for Windows 8. There are many settings to configure.
5. Personalize
You have the option of changing settings for the lock screen, start screen and your account picture. Under lock screen, you can change the lock image from a decent amount of images preloaded on Windows 8 or from your own collection of images. The choice is yours, though it's difficult to beat the gorgeous images that come with Windows 8.
You can also change lock screen apps. These are apps that run in the background and will continue to give you updates while in "locked" mode, e.g. the email app will give you a notification of a new email on your lock screen. The three that run in the background by default are: instant messaging, email, and calendar. You can add more. Some even have the option of giving a detailed status like the calendar app.
Start Screen. The settings for this deal with the background art for the start screen and the color. By default the color is turquoise and has the circle art. You have 6 choices to choose from for the background of the start screen: 5 designs and then the option of no design. The color options offer a healthy amount of choices.
Account Picture. Not much to see here. There is the "browse" button for choosing from pictures currently installed on your PC or you can create an account picture if you have a webcam by using the webcam app.
6. Users
This section deals with user settings for the PC: local and domain. If you're connected to a domain, then you many or may not have privilege to change your domain user settings depending on your domain policies. The first button we see is "connect your Microsoft account" which if chosen will sync your domain settings with your Microsoft account settings. I'm not entirely sure on how this works yet. I've read different things, but my theory is that web-facing apps you personally use will utilize your Microsoft account settings while domain stuff like group policy and such will utilize your domain settings allowing the two settings to work harmoniously together.
The "manage domain users" stuff works like windows 7. When clicked, you will be taken to desktop mode to tinker around with the domain users for the PC. You can also add a user here. When clicked you will be taken through the "add a user" wizard.
7. Notifications
This is a simple section. You can turn on and off notifications for apps and whether notifications are shown at all or in lock screen or heard.
8. Search
You can choose how search works. Turn on or off features like "show the apps I search most often at the top" and "let windows save my searches as future search suggestions." You can delete search history and turn on or off the apps you want to use search.
9. Share
This area is limited. The two top options are turn on or off whether you want to see apps most often used at top and show a list of how you share most often. At the bottom you have two apps to choose from for turning on and off their sharing ability: mail and people. Of course, this a fresh install PC. I don't have many apps installed, I'm sure when the list of apps installed grows more will be populated in this "share" list.
10. General
Usually general settings aren't very fun. They are usually confined to date/time, spelling, language, and such and all of that is here in Windows 8's general settings, but there are two very exciting features here in the general settings: refresh your PC without affecting your files and Reinstall Windows. I'm very excited about these two features. The first option "refreshes" your pc without losing, photos, music, and other personal files (system restore?) and the second option is for staring all over - factory fresh. This is very nice.
11. Privacy
Ah yes the privacy settings. Not much to see here. These are turn on or off functions for the following: apps use my location, let apps access my domain info, and let help improve windows store by sending URLs apps use.
12. Devices
This section gives a list of devices connected your PC locally and via the network. You can also add a device here.
13. Ease of Access
In this section there are on/off functions for making the display and audio better for you. Narration is here, length of time notifications are shown, and cursor thickness.
14. Sync Settings
This section is for users who have settings synced between their local/domain account and Microsoft account. There are many options to choose from: personalize, desktop, passwords, ease of access, language, app settings, browser, and other windows settings.
15. Homegroup
This is for home networks. What's shared, what isn't, and privacy stuff.
16. Windows Update
Check for updates, choose your update method.
I didn't include a screenshot for every setting because that would have been overkill I think. I decided to take a text approach. I did include a screenshot of the main PC settings screen and from that you can probably tell how each section will look and feel. I hope this has been helpful.
Tuesday, August 14, 2012
Daily Security Checklist
I don't fancy myself as one of the greats in the IT world. I know I'm a lowly rookie IT professional just starting out, but I do think my daily security checklist is worth sharing. If you don't have a security checklist you go through each day you might want to create one (heck, steal mine I don't care) just so you will be able to catch things in time and for peace of mind. If I'm able, I go through this checklist first thing before I do anything else unless there's urgent work waiting for me as soon as I step through the double doors (we have a set of double doors at our building - nothing fancy, but it's kind of cool to walk through them all bad and stuff). This checklist is tailored for our network, so I'll be using the names of hardware and software we have. If you don't have the same hardware and software, replace the name for your configuration, e.g. replace Sonicwall with Cisco, Juniper, etc.
Checking the border - Firewall and DNS
Our border firewall is a Sonicwall TZ 210. This bad boy is perfect for our environment: small in physical size, priced just right, excellent security, small learning curve, and boasts a lot of tools for the admin. I check the Sonicwall logs first thing because that is the point between us and the "external." I check the following logs: attacks, anti-spam service, and networking. I then move over to the current connections under the firewall tab. After that, I check out the current data from the security dashboard. I'm not familiar with other hardware/border firewalls, Sonicwall is my area, but I would think Cisco and Juniper have similar types of logs and such. I think it's important to check the logs first thing and the current connections in and out of your network. After a while, you'll notice the "everyday" stuff. Even though it's tempting to not check these things after a week or so of clean data don't do it. Resist!
DNS security
This step might not be a necessary step depending on your configuration. I check our OpenDNS records after the border firewall check because next in line is our DNS security, so that's the logic I follow (maybe it sucks, but it works for me - haha). Anyway, I login to our OpenDNS dashboard and check the logs. It's important to see what network users are accessing and trying to access. I notice a lot of adware and malware blocked by OpenDNS. The cool thing about OpenDNS is their alert system. If OpenDNS has detected malware, you see the alert in big red letters on your dashboard. The only problem is that OpenDNS can't give you the internal IP address, but it's because it's border protection. So, not only is OpenDNS good for web service, but it's security system is nice as well.
Checking the Inside: Network Monitor, Server, and Antivirus
I then move on to internal checks. Network monitoring tools come in handy here, e.g. LANsweeper and Spiceworks, checking vulnerabilities on PCs and non-PCs. LANsweeper has an excellent dashboard view giving you information like the following: pcs not up-to-date, infections, low disk space, recent changes and other cool stuff for non-PC devices. Most network monitoring software does this. I check the necessary reports then move on.
Next, I check the Windows Server 2008 R2 logs in the server manager. If you don't use Server Manager I recommend it for the simplicity. Everything you need for quick checks is there: roles, functions, and event viewer. I check the high priority events then move on to antivirus. We use Kaspersky Small Office Security. I check the scans of all the PCs in the network to make sure there weren't any infections detected and I also check to make sure all of the PCs were updated.
That is my security checklist. I follow the outside to inside approach because it makes sense to me. Usually the biggest threats will come from the outside (threats users don't notice) and the smaller threats are on the inside. If you have any suggestions feel free to comment on this post. I'm usually on the lookout to improve my checklist.
Microsoft Security Essentials and me
1. It does a very good job
Recently, before running a malwarebytes scan on an allegedly malware infested system, I'll run a scan on the pc with the system's currently installed antivirus agent. One particular example I can think of was an AVG 2012 protected system. The system had all of the indicators of a malware infestation. I ran a scan with AVG and it returned a "no infections found" report. I uninstalled AVG 2012, installed MSE and on the initial quick scan, MSE found a few trojans and some adware. I ran a full scan in safe mode just to be safe and the scan was clean. I then ran a Malwarebytes full scan, still in safe mode, and the report was clean. I couldn't believe it. I then started using MSE myself and I install it on client systems. MSE obviously doesn't find infections every time on the first initial quick scan after install. Sometimes, the infestation is deep in the system and something more powerful like Malwarebytes would need to be used, but for general protection I'm learning that MSE is better than others like AVG, Avast, and Panda. It's at least better than their free versions.
2. It's Anti-annoying and anti-expensive
"It's true. It's true," said Kurt Angle when asked if MSE was anti-annoying and anti-expensive. I'm just kidding. To my knowledge Angle hasn't been interviewed on MSE (it was funny though, right?). No, but MSE is very silent, lean, and doesn't annoy you unless it has protected you from a threat. It doesn't even tell you when it's been updated like other antivirus programs.
I received a call from a client last week about a problem. He told me his computer was acting funny, i.e., Internet Explorer was crashing every few seconds. When I arrive at this site, he gives me free reign. Before I do anything, I check to see what is running (down close to his clock) and I see that Avast! and MSE are both running. I remembered installing MSE on his pc a while back, but didn't remember Avast! being on his pc. I asked him if he installed Avast! and he said he did just a week ago because he didn't think he had antivirus running on the system since he wasn't getting alerted every day about something. I laughed and showed him MSE was on his system and that was his protection from threats. He mentioned that he remembered me giving him an overview of that, but thought I didn't install it because he couldn't tell it was even on there. That's one thing that makes MSE better than the rest. It's anti-annoying.
3. Lightweight
MSE isn't resource intensive. You don't even notice it updating, scanning; you forget it's even there. Compared with Avast! and AVG, it's very skinny.
The only complaint I have is with scan scheduling. You can either schedule a quick scan or a full scan, but not both. Personally, I would like to have the scan schedule be a quick scan Sunday through Friday, then a full scan on Saturday, but MSE (as far as I know) won't let you do schedule like that. It's a very minor flaw. I have my schedule for quick scan 6 days a week, then do a manual full scan once a week. It's no problem.
Download MSE here.
Wednesday, August 1, 2012
RAID 5 Hell

One of my co-IT-workers is off for sick leave this week and probably two more weeks so all calls from his department will go to me. I get a call on Monday that a lady can't remote in to her mapping server. She said she went to the server to see if it was powered on (good idea!) and it was on, but it was stuck at "press F1 to resume." She said that when she hit F1 the next screen was something "...about RAID-5 degraded not bootable" message. My first thought: CRAP. I know that RAID-5 needs at least three hard drives to be operational. If one fails, you can swap the bad drive out with a new drive of identical brand and same size or larger to rebuild the RAID, but if two fail then there is a serious possibility of not being able to rebuild the RAID. In fact, I don't know of anyone rebuilding a RAID-5 array from a two out three hard drive failure; maybe someone out there has and if you have then please tell me the story because I would love to add it to my growing list of tech stories. Anyway, I check things out and after about a hour of doing troubleshooting I come to the conclusion that two of the three hard drives are in fact failed drives. CRAP. I let the user of the server know that I can run to the local Staples, grab two new drives and just see if I can rebuild the array. She says, "cool" and that's the plan. I write down the type of hard drive used in the array: 1 TB Seagate Barracuda 7200 RPM.
I arrive at Staples, they have that type of drive and I immediately do my happy dance. I take the card to the cashier, she calls for a tech to go in the back and grab two drives for me, he comes back to the front with one drive and informs me that they only had one drive left. I then execute my sad face. I go ahead and purchase the one drive. When I get back to work, I inform the user of the happenings. She is somewhat sad. I tell her we can try and rebuild the array with the working drive, the new drive, and one of the failed drives just to see if we can rebuild it (I'm somewhat of a hopeful guy who likes to try almost certain failure scenarios) and to no surprise the RAID would not rebuild. We went through the immediate actions we could take:
* Reinstall Windows Server 2008 R2 on the new drive, add the second drive as a backup drive, and order a third drive and install it when it arrives and use that as a backup drive also. The server would be up and running in just a few hours.
* Wait for a new drive to arrive in at the earliest two days. Install the third drive with only a small possibility of the RAID-5 Array rebuilding. The server would not be up and running soon. Two departments use the server to access maps out on the road and at remote locations.
We went with the first option. From this experience it's plain to me that RAID-5 sucks unless you have a five or six RAID-5 array. I would rather have updated system-image backups of the computer for simple restore options in case of system failure. RAID-6 and RAID-10 I think are nice arrays, but this is the second time I've had problems with Intel's RAID-5 arrays. In the past, before this experience, I was able to shut-down the PC, disconnect then reconnect the sata cables and the array would rebuild itself. I never had an issue with RAID-5 array drives failing. The good thing in this experience is that this mapping server pulled its data from another PC so there was actually zero critical data loss. The only thing lost was availability. The mapping company will have to come down to our location and install the mapping software, but that should be by the end of this week.
RAID 5 or RAID 6?
Subscribe to:
Posts (Atom)